Chat Application Using Rate Limiting Security
Andhika Octa Indarso
Summary
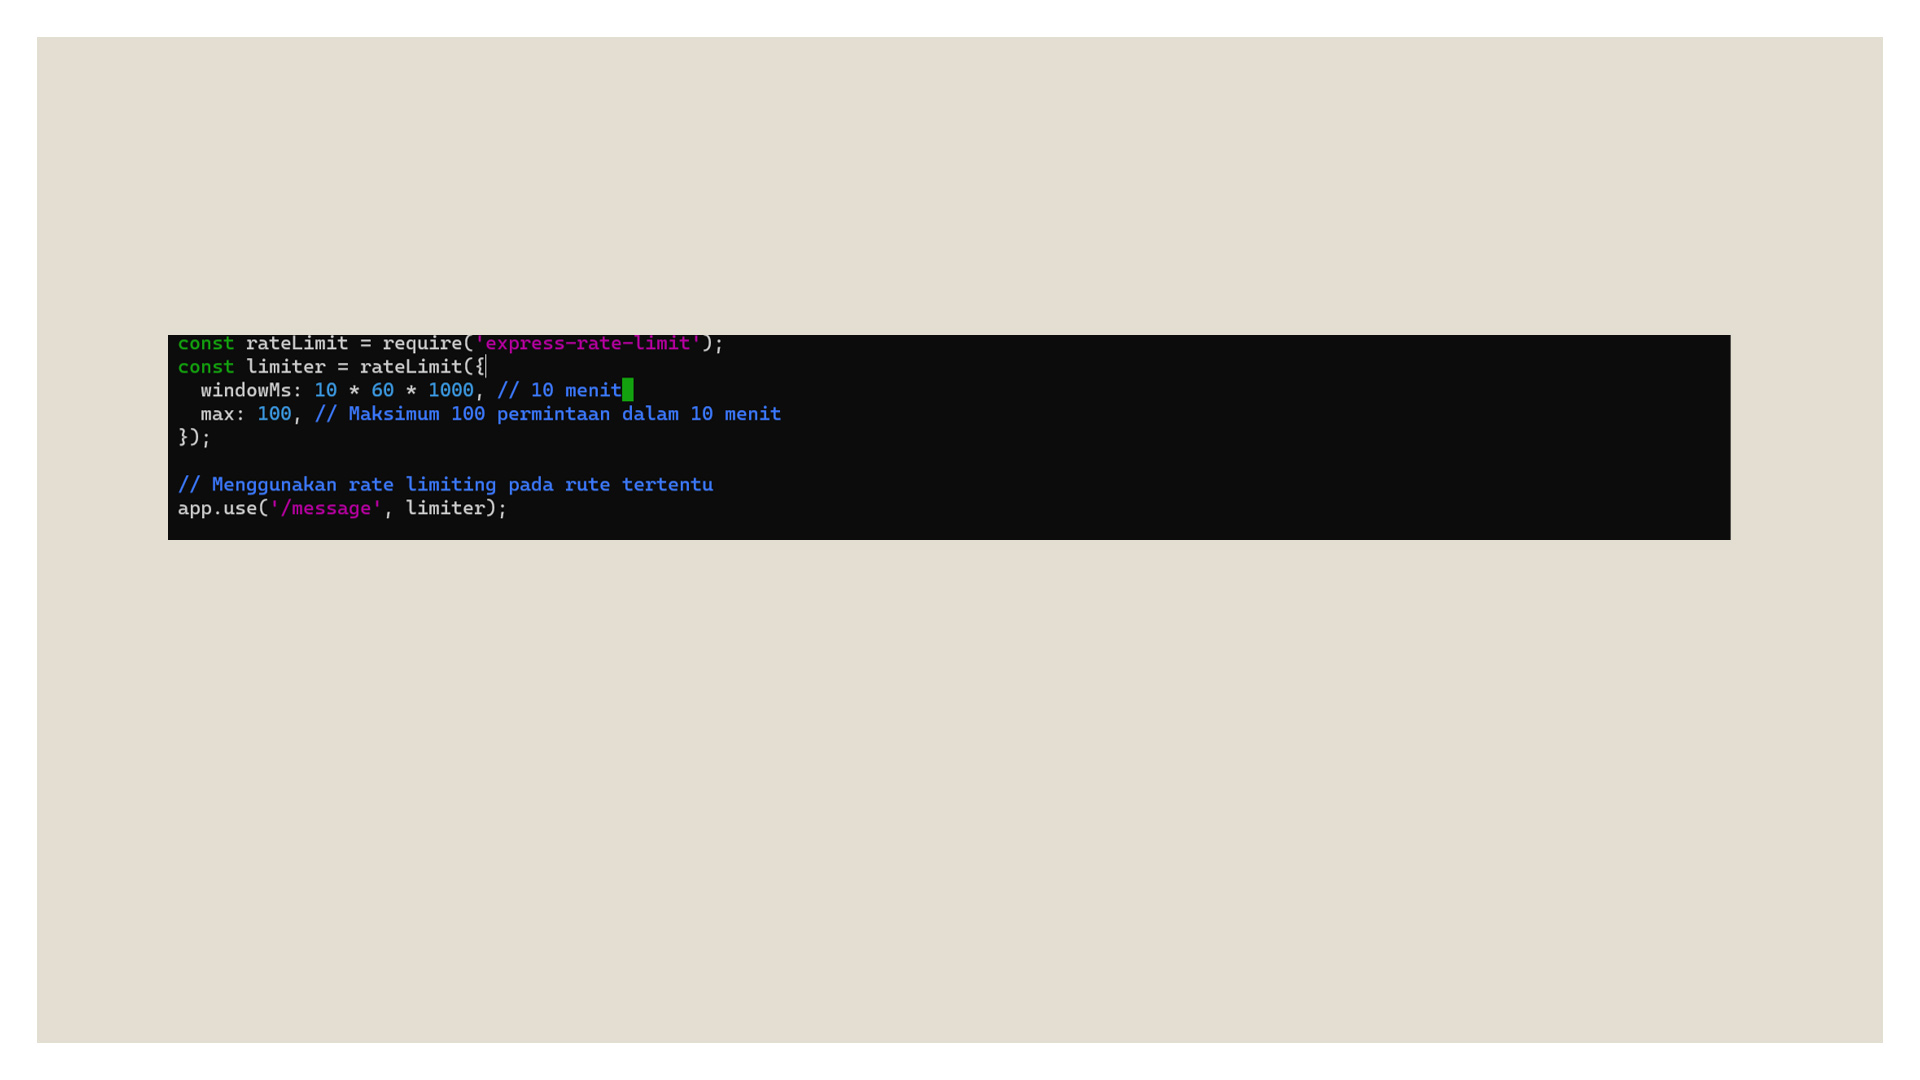
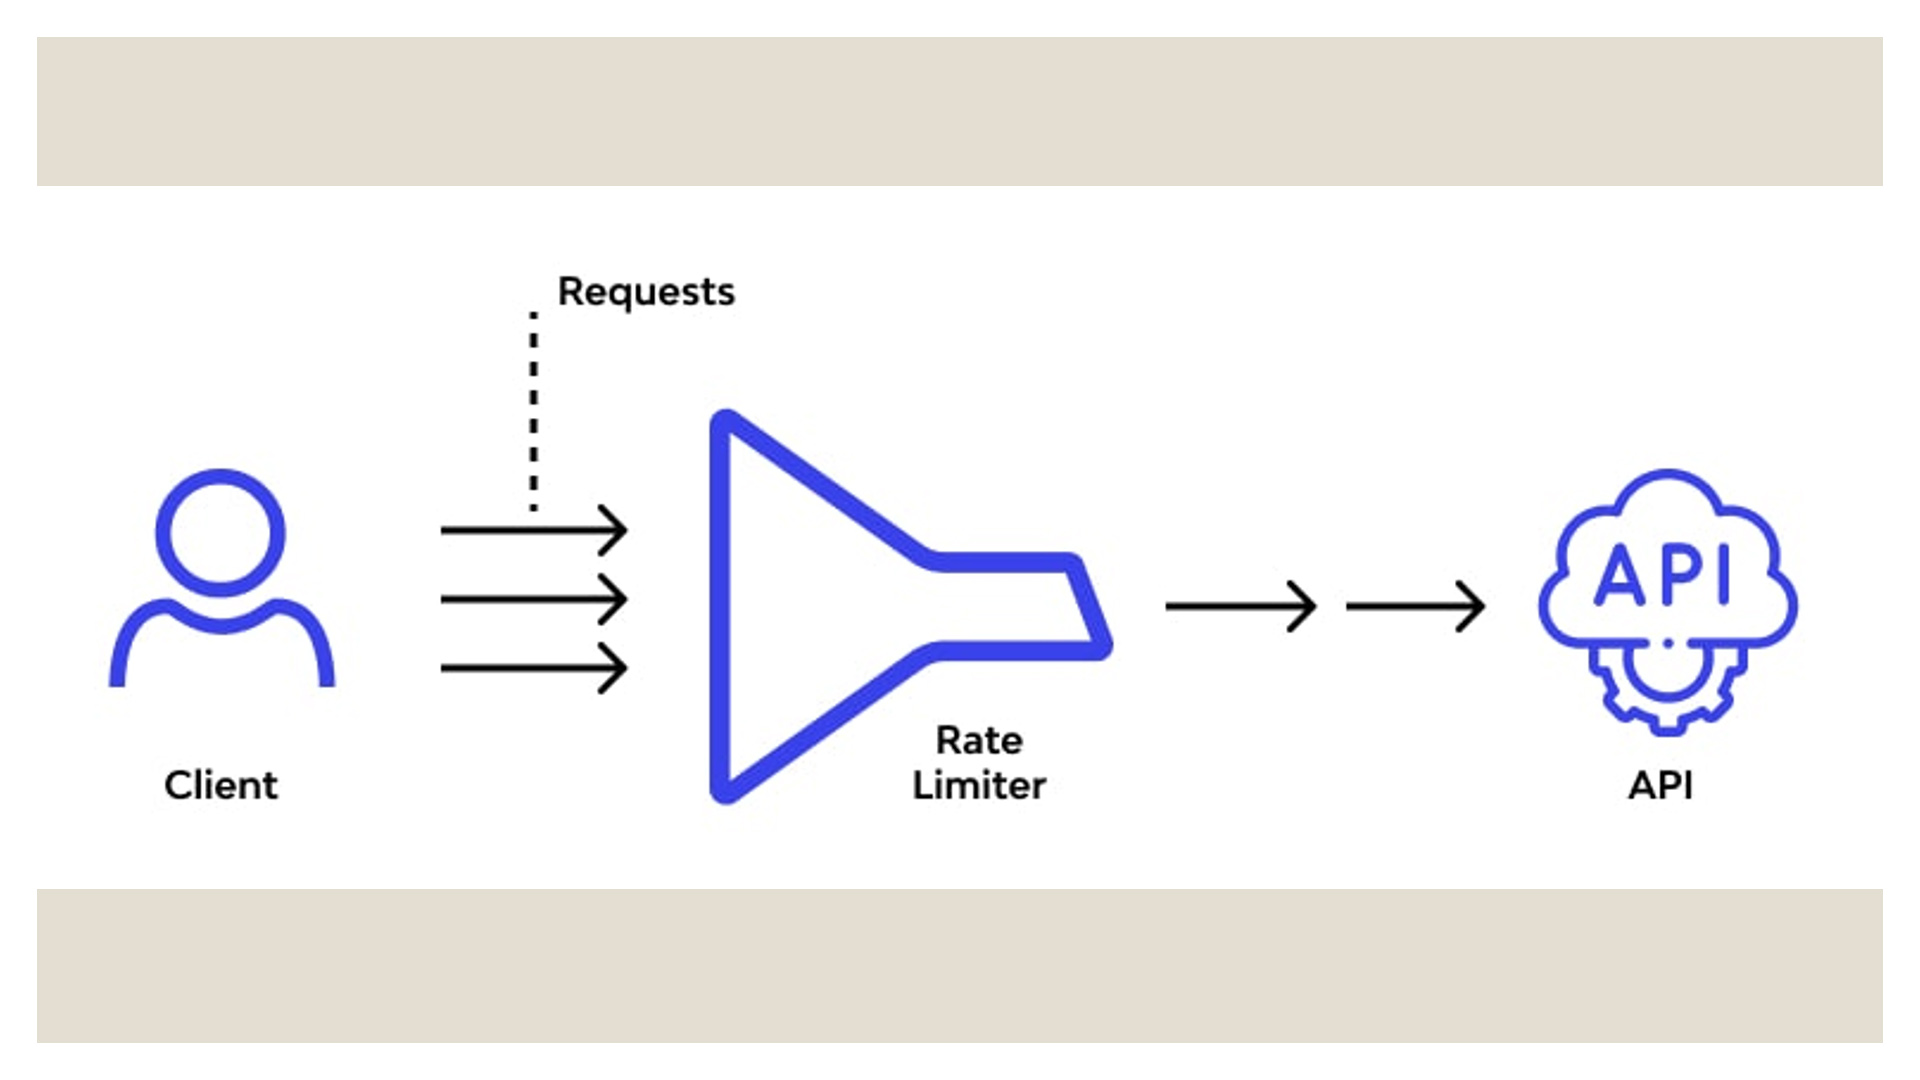
The chat application is an example of a simple application that can be built using Node JS. Here is building a simple chat application on microservices with Node JS. In addition, there are many ways to secure these applications in microservices, starting from Input Validation, Using the HTTPS Security Protocol, Authorization to Rate Limiting. In this portfolio, the chat application created is given security in the form of Rate Limiting. Rate Limiting is a rate limiting request to prevent DDoS attacks or excessive use of chat applications. In order to use this method, all you need is a library like express-rate-limit to be able to set the limit.
Description
Before building a chat application, we prepare the server first. The server used in making this application is VPS 2 which is at 103.3.220.64. After logging in, it will appear like the following.

Create Chat Folders
After successfully entering the server we are headed. Let's create a folder that will be used to store the codes we make. Using the mkdir command, we create a chat folder name, as shown in the following image.

Initialize Node.js
Node.js is a runtime environment for JavaScript that is open-source and cross-platform. With Node.js we can run JavaScript code anywhere, not just limited to the browser environment.
Node.js runs the V8 JavaScript engine (which is also the core of Google Chrome) outside of the browser. This allows Node.js to have high performance.
Node.js also provides many JavaScript libraries/modules that help simplify web application development. Following are some of the important features of Node.js that make it a top choice in app development:
- Asynchronous & Event-driven
All APIs from Node.js are asynchronous, meaning it doesn't block other processes while waiting for one process to finish. The Node.js server will proceed to the next API call and then utilize the event notification mechanism to get a response from the previous API call.
- Very Fast
Code execution with Node.js is very fast because it runs on Google Chrome's V8 JavaScript Engine.
- Single Threaded but Highly Scalable
Node.js uses a single thread model with event looping. This mechanism helps the server to respond asynchronously and makes the server more scalable than traditional servers which use multiple threads to handle requests.
After creating the folder we need, because the application we are running uses node.js, we will initialize node.js in that folder. The command to start initialization with the npm -init -y command.

Initialize Socket.io
Socket IO is an open source real-time engine built on top of Node.js. With Socket.io we can communicate in real-time, two-way and event-based communication. With event-based communication, we don't need to request to get the latest data, all we need to do is listen / subscribe to a topic. So as long as WebSocket remains active and listens to a topic, if there is new data on that topic, we will get the data automatically. Socket.IO is divided into 2 parts, namely:
- Server: Backend web
- Client: Frontend web, Mobile, dll
To start installing socket.io on the server we run the command npm install socket.io.

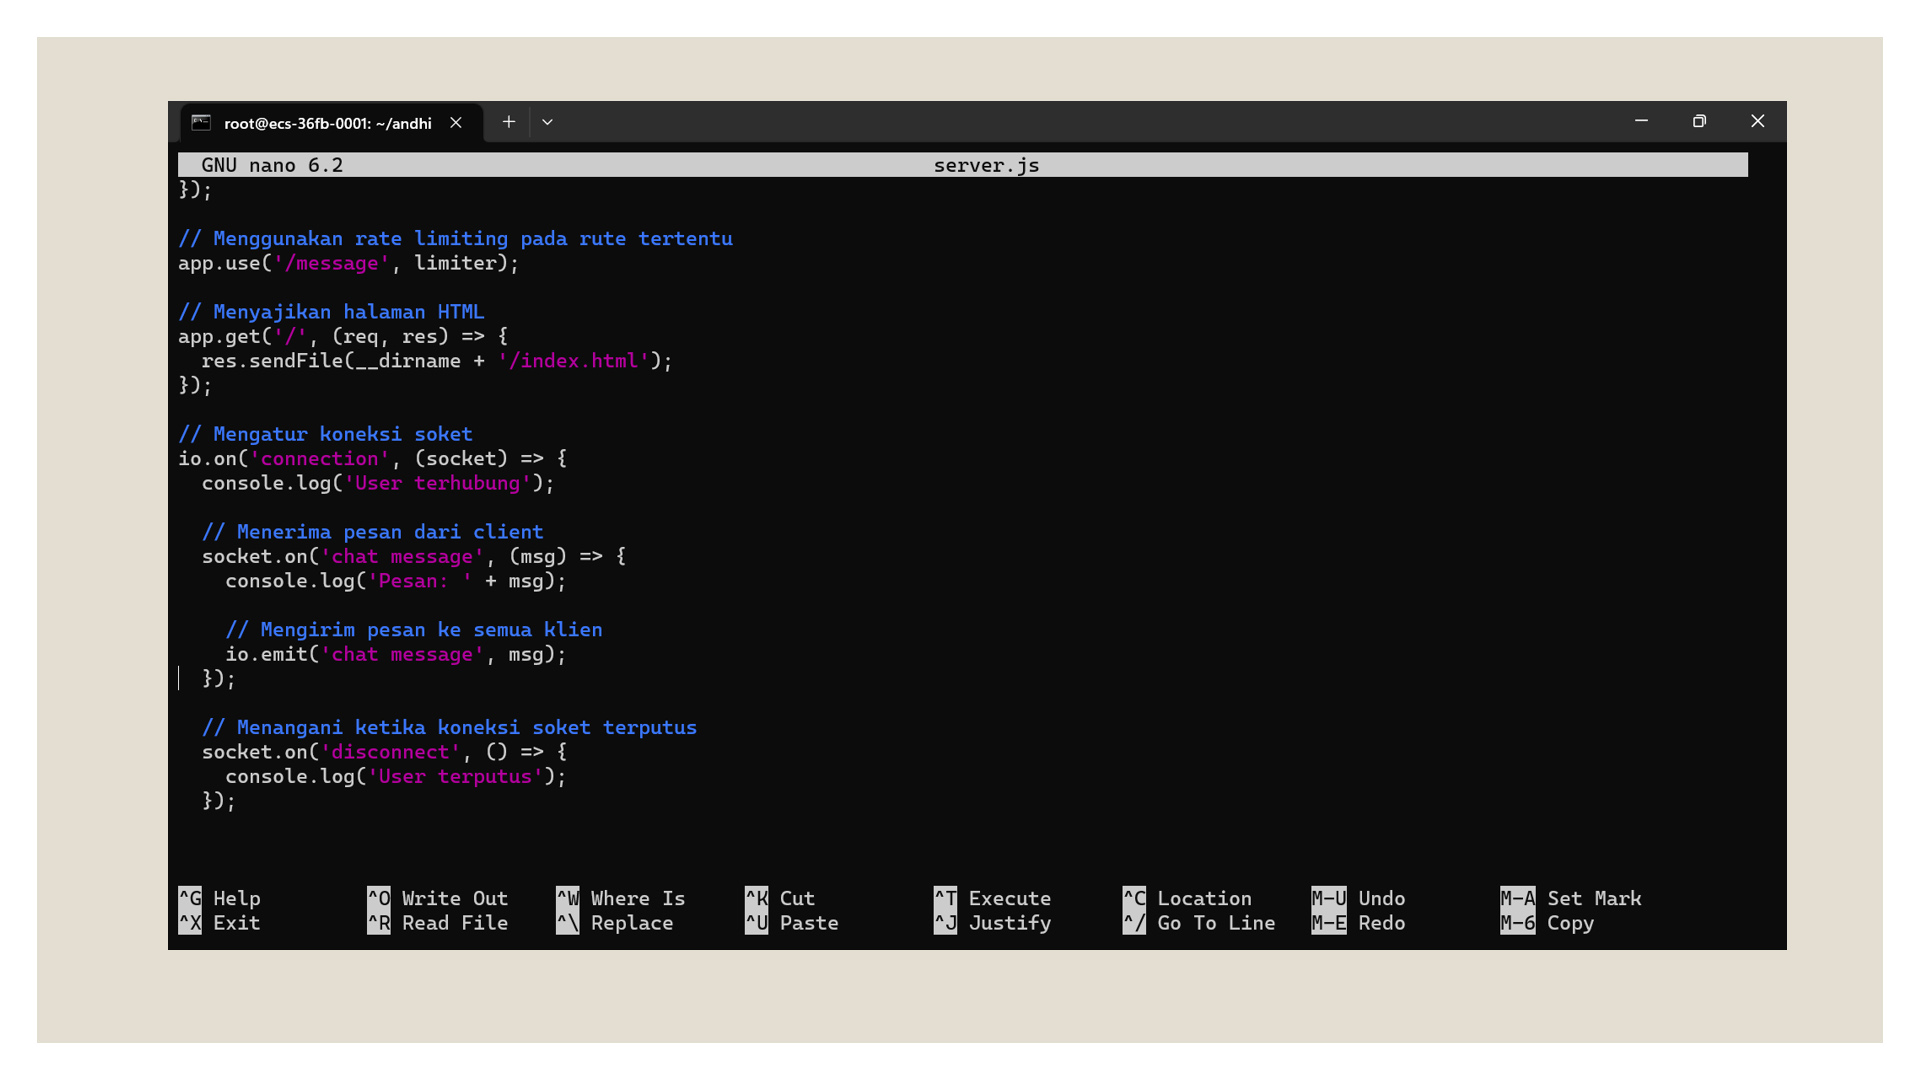
Create Server.js
The next step is for us to create an application with the name server.js using the nano server.js command. Then we save and exit back to the chat folder.

Create Index.html
Successfully creating a command to run the application, we will try to make it look simple using HTML. The command to add a new file using the nano index.html command.
Here is the code we add to it. Then save and exit to the chat folder.

Running the Server
After making the appearance, then we try to run the server using the node or nodemon server.js command. If there is no problem with the server connection, a notification will appear that the server is running on the port that is set, namely port 3000.

After the server is successfully running, we try to run the interface of this application through two browsers.
Running Applications in 2 Browsers
In order to see the difference, we try to open 2 browsers, namely Google Chrome and Mozilla to start a conversation. The simple appearance of this chat application is only an input form and a message sending button.


Start a Conversation
The conversation starts by entering a message in the form, we type Send from the Google Chrome browser. Then press the Send button.

We open the Mozilla browser, the message that we sent earlier will appear via the Google Chrome application browser.

API request rate limiting to prevent DDoS attacks or overuse. We can use a library like express-rate-limit to enforce this limit.

Informasi Course Terkait
Kategori: Cyber SecurityCourse: Persiapan Sertifikasi Internasional CyberSAFE (Cyber Security Awareness For Everyone)